Controller Bindings
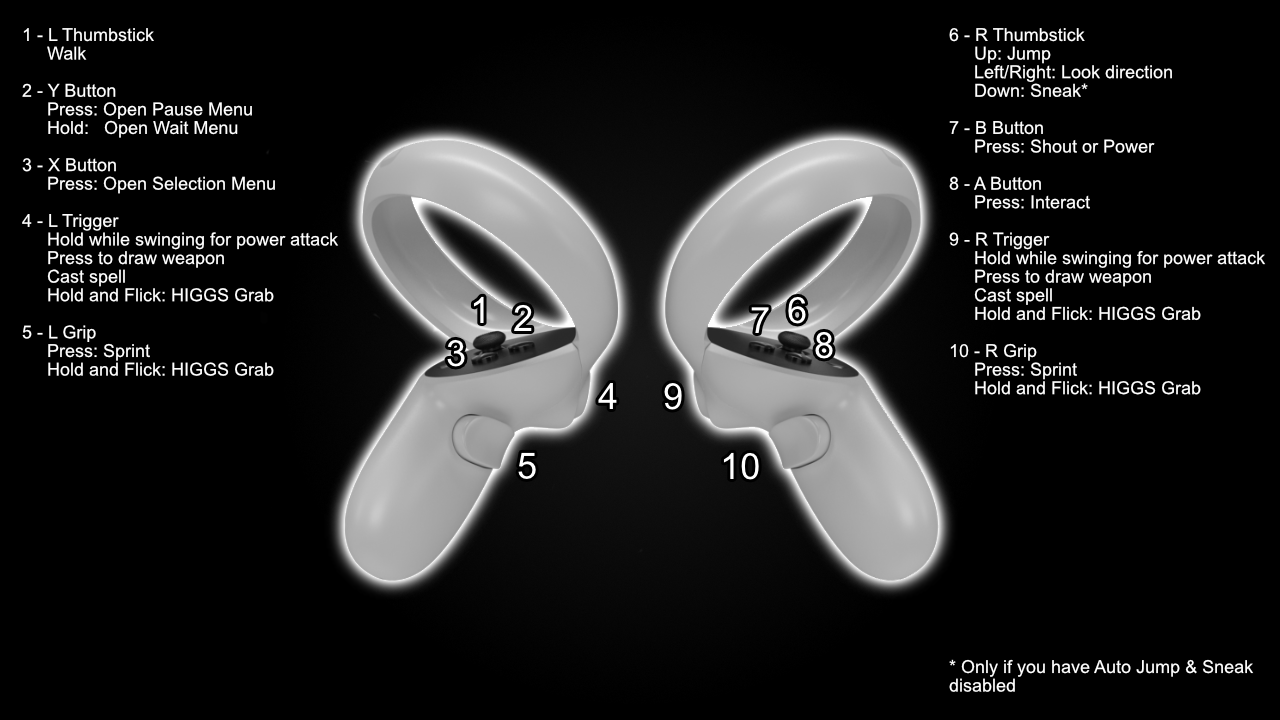
Oculus Headsets
Neo’s Bindings (must be enabled before creating character)
Valve Index (with the Alternative VRIK Bindings selected)
Gameplay Bindings
| Binding | What it Does |
|---|---|
| Left Thumbstick | Movement |
| Left Trigger | Cast Spell / Power Attack |
| Left A (Press) | Tween Menu (Inventory / Magic / Map / Skills) |
| Left A (Hold) | Draw / Sheathe |
| Left B (Press) | Wait Menu |
| Left Grip (Hold) | Sprint |
| Right Thumbstick | Turn (L/R), Jump (Up), Sneak (Down)* |
| Right Trigger | Cast Spell / Power Attack |
| Right A | Activate |
| Right B | Shout |
| Right Grip | Exit Menu |
Inventory Bindings
| Binding | What it Does |
|---|---|
| Left Trigger | Equip to left hand |
| Left A | Drop |
| Left Grip | Exit Menu |
| Right Trigger | Equip to right hand |
| Right A | Take single item |
| Right B | Favourite item |
| Right Grip | Item Zoom |
WMR Headsets
For WMR headsets, all bindings are default except…
| Binding | What it Does |
|---|---|
| Right Touchpad | Shout |
| Right Grip | Interact |
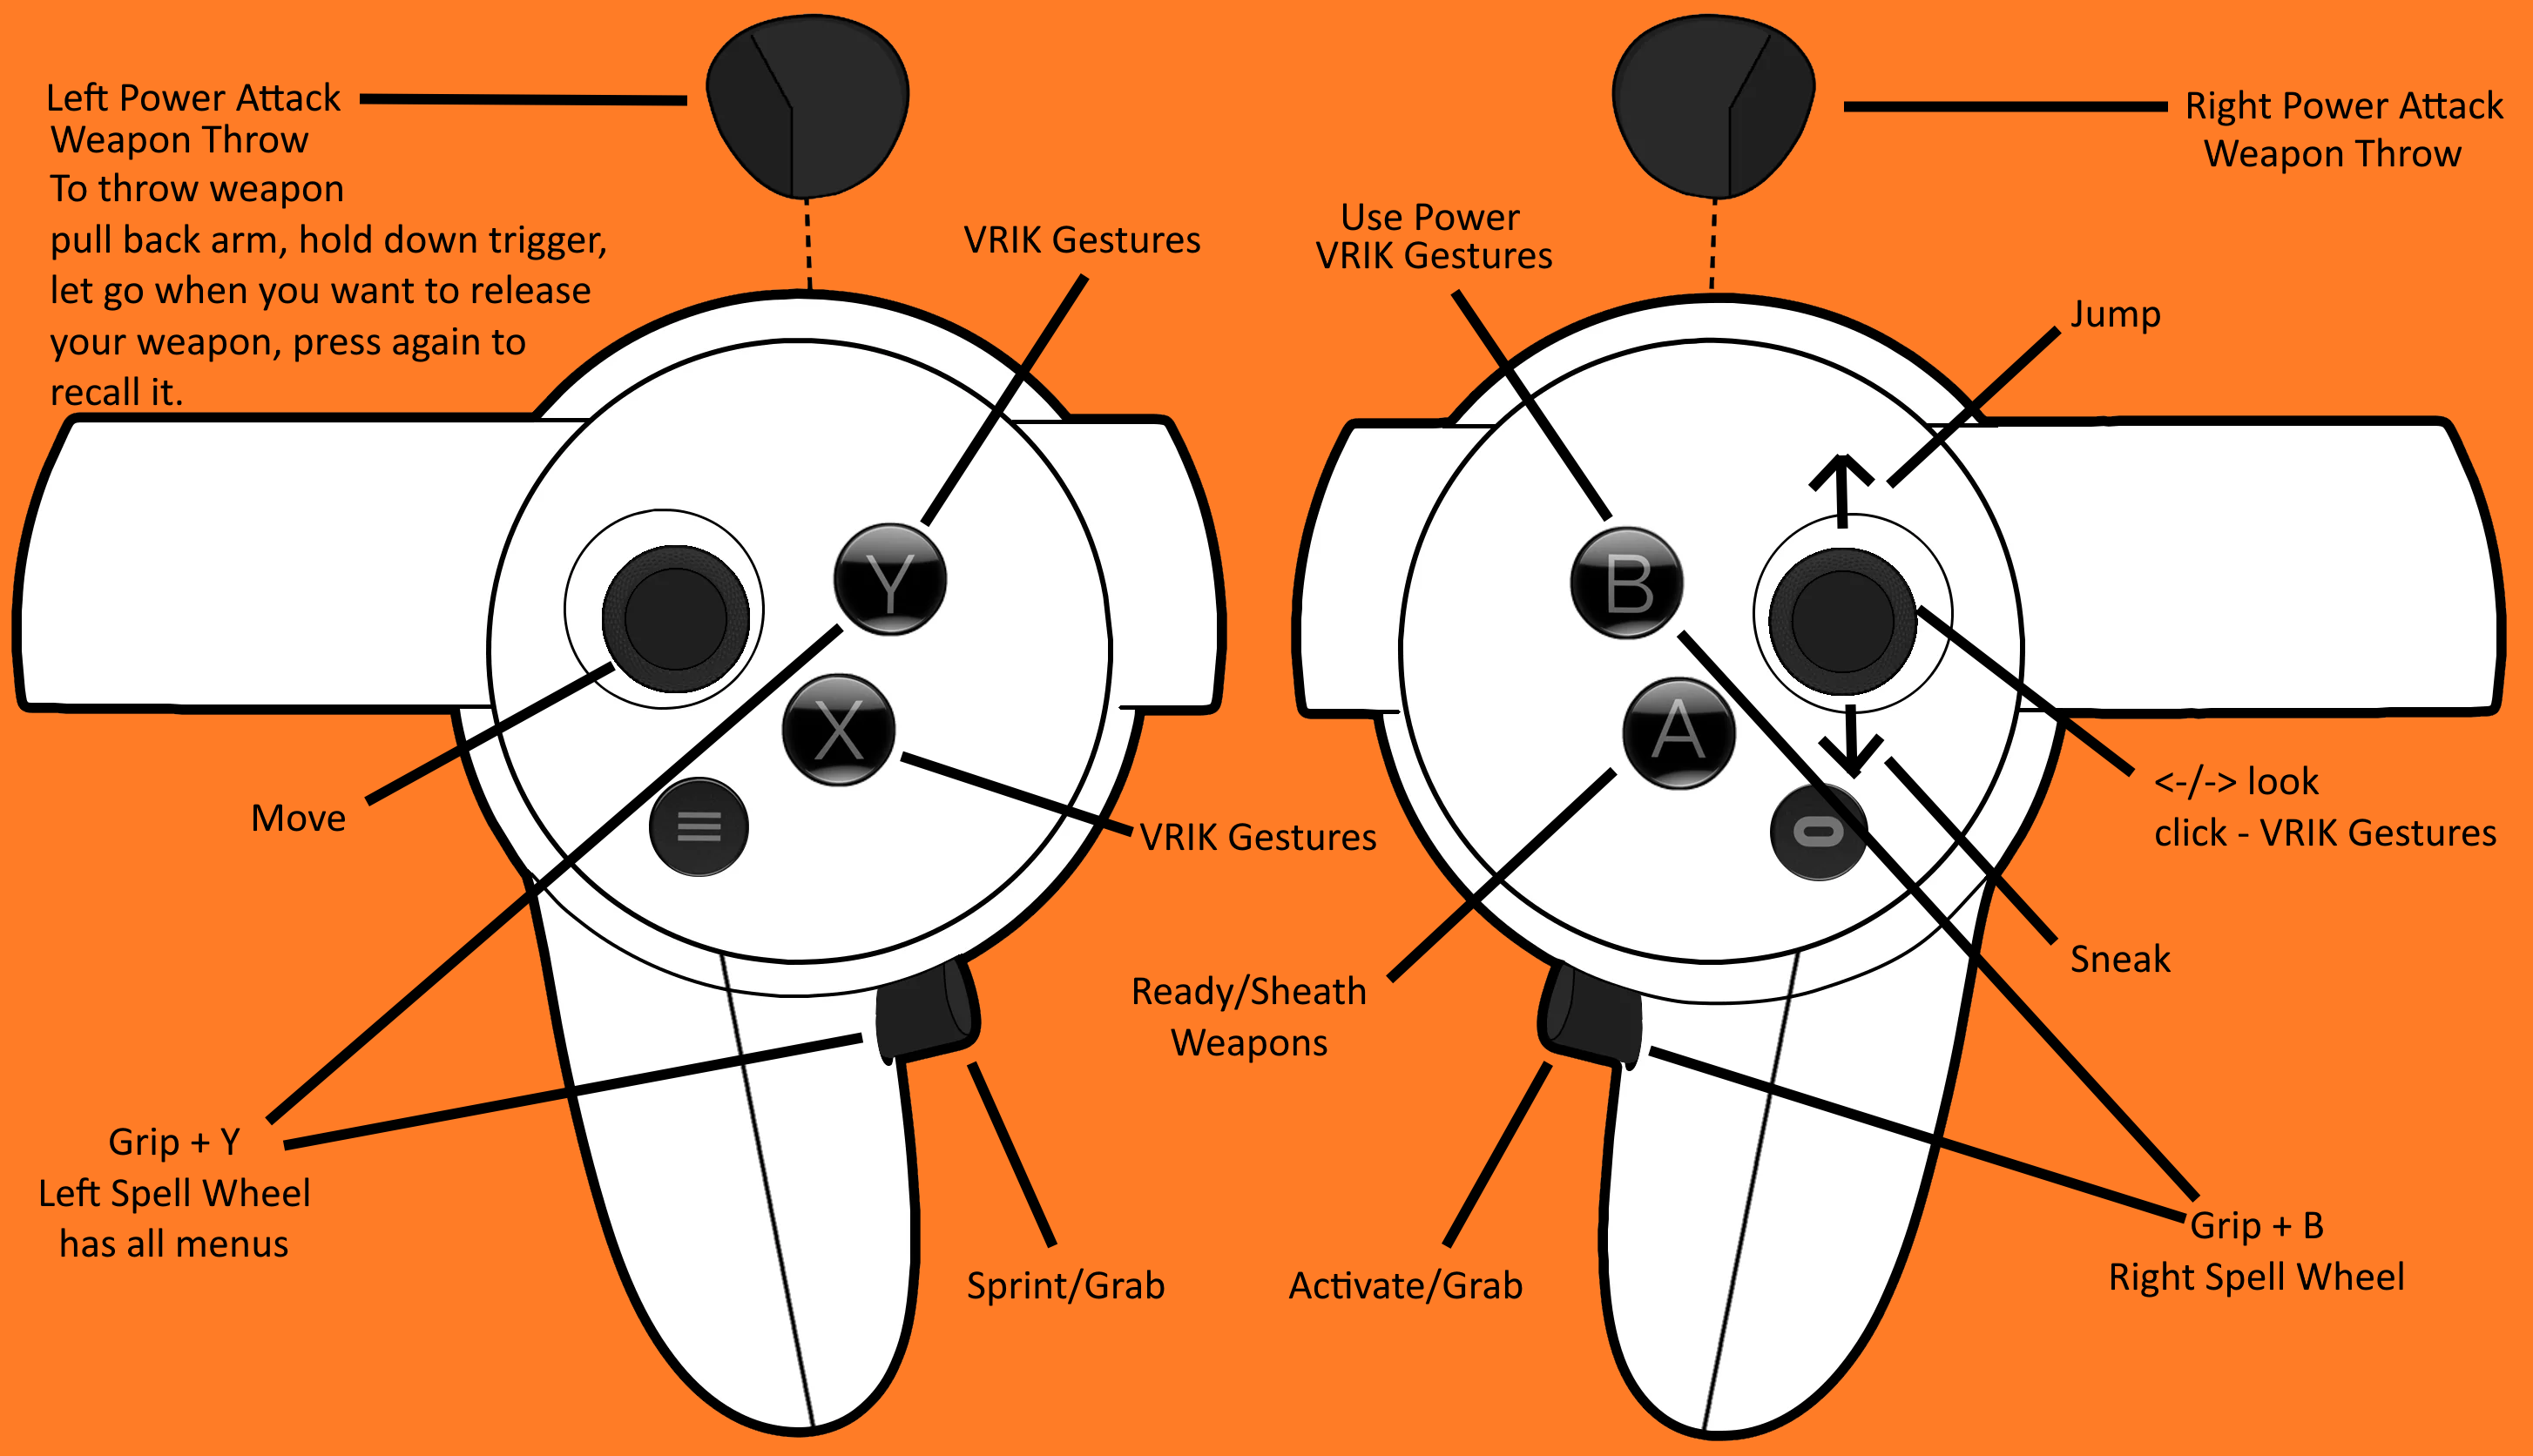
Other Bindings
There are some other bindings added by mods:
- L or R Thumbstick Click - VRIK Gestures (configurable)
- L or R Grip - VRIK Holsters (configurable)
- L or R Both Grip & Trigger - Spell Wheel
- L or R Trigger, Swing and release trigger - Throw Weapon
SexLab VR Controls
These controls only apply when in a SL scene. The direction indicator means to move your whole hand, not the thumbstick! If using Neo’s bindings L Thumbstick click = Y
- R Thumbstick Click + Left - Previous Scene Stage
- R Thumbstick Click + Right - Next Scene Stage
- R Thumbstick Click + Up - End Scene
- R Thumbstick Click + Down - Swap Actor Positions
- R Thumbstick Click + Forward - Toggle Scene Auto-Advance
- R Thumbstick Click + Back - Toggle 1st/3rd Person Mode
- R Thumbstick Click + Left then Right - Previous Animation
- R Thumbstick Click + Right then Left - Next Animation
- R Thumbstick Click + Down then Up - Move Scene Location
- R Thumbstick Click + Up then Down - Toggle Free Cam or Fly Cam mode
- R Thumbstick Click + Forward then Back - Disable/Enable Animation
- R Thumbstick Click + Back then Forward - Rotate Scene
- L Thumbstick Click + Up - Adjust Schlong
- L Thumbstick Click + Left - Align Actors for current stage
- L Thumbstick Click + Right - Align Actors for all stages
While adjusting:
- L Thumbstick Click - End Adjust Mode
- R Thumbstick Click - Reset Adjustments for current animation
- Left Trigger (Hold) - Grab and Adjust Actor/Schlong by movement of left controller
- Right Trigger - Select next actor to adjust
TNG Controls
- Hotkey 4 to open the TNG NPC editor, if there is an NPC in you crosshair i.e. right in front of you it will edit them but if there is no npc found it will edit the player.
- A Vrik gesture has been pre bound to R Thumbstick Click + Back Then Forward to access the menu without using your keyboard.
Default VRIK bindings
- L Thumbstick + Down - Drop Lit Torch
- R Thumbstick + Down - Select body preset
- R Thumbstick + Back then Forward - TNG NPC editor
Personal Advice
If these gestures don’t make sense to you head to the gameplay guide and watch the first video linked at the bottom to learn more about gestures.